Jump to content
SingaporeBikes.com Telegram Now LIVE! Join NOW for the Last Reviews, News, Promotions & Offers in Singapore! ×
  • Join SingaporeBikes.com today! Where Singapore Bikers Unite!

    Thank you for visiting SingaporeBikes.com - the largest website in Singapore dedicated to all things related to motorcycles and biking in general.

    Join us today as a member to enjoy all the features of the website for FREE such as:

    Registering is free and takes less than 30 seconds! Join us today to share information, discuss about your modifications, and ask questions about your bike in general.

    Thank you for being a part of SingaporeBikes.com!

Recommended Posts

Posted

Extract from http://www.svrider.com/


Tips & Tricks / How to's

Taking off the warning stickers

Use a hair dryer to warm the stickers up


gently peel starting at one corner and work your way across


any remaining goo can be cleaned up with WD40 or GooGone, a citrus based cleanser.


Note: As one unhappy soul has already tried this... DO NOT try to remove the SUZUKI stickers from the tank - they are under clearcoat! Doh ;0)


Another Option:


Everybody always uses heat. I was given a tip 25 years ago, and still feel like it is THE fastest most effective way to remove an adhesive backed sticker. Get a can of ether starting fluid from an auto parts store. Spray some at the edge of the sticker to loosen the edge. Start peeling the edge up, then as soon as you can get a bit of a grip on the sticker, start a continuos light spray of ether at the point the sticker is coming up. The sticker will come right off, and if there is any remaining adhesive it can be wiped off with ether on a rag. Don't worry about the ether dripping on everything because it will evaporate in seconds and will not harm the paint. WARNING this stuff is highly flammable, do this outdoors only. You must have good ventilation and absolutely no spark of any kind.


Yet Another Option:


I just got my SV650s yesterday. (oh YEAH!) and the way I removed my stickers is that I used a surfboard wax scraper (I'm in Hawaii) to scrape off the paper part. To remove the residue basically fight fire with fire. Nothing sticks to residue better than sticky stuff itself. Just use the back of some masking tape and start sticking the residue off. After a couple pats it comes right off, clean. Everybody has masking tape in their garage and if you don't have a surfboard scraper, well, you always have your fingernails.


And yet another option:


Like many of you I bought a brand new SVS and love it. What I didn't love however were the patronising stickers splashed all over. They advised me to "Never drink and ride", "drill holes in the frame" and to "always wear a helmet"...as if anyone with even half a brain cell would consider contravening any of this advice.


Anyway, forget the hairdryer, forget the ether the fastest way to get rid of these stickers is to take the bike out for a 100+ mile ride on some of Great Britain's best coastal roads. Then when you get back whilst the bike is still hot the "idiots guide to biking" stickers will peel easily off. Simple and a good excuse for a blast!


Just a thought: The wife bought a new car the same week as I got the SVS. Did she did not have to peel stupid, patronising stickers off her new shinny paintwork? No, even Ford aren't that daft!


Keep riding, stay safe!

Mark, UK


And yet another option:


WD-40 and GooGone just won't cut it. What you do is you take NON-ACETONE fingernail polish remover and wipe off the goop in about half the time. Make sure it's non-acetone so it won't ruin the paint! I did this to my bike and it's still as pretty as usual! After you get the goop off, wash your bike. Most of the fingernail polish remover will have evaporated but wash it just to make sure!!


Jeff

http://i82.photobucket.com/albums/j259/SV650_photos/P1140039.jpghttp://i82.photobucket.com/albums/j259/SV650_photos/P1130008.jpg
  • Replies 5.2k
  • Created
  • Last Reply

Top Posters In This Topic

Top Posters In This Topic

Posted Images

Posted

Extract from http://www.svrider.com/


Tips & Tricks / How to's

good way to do a wheelie

Date: Friday, August 24, 2001

From: Marco

First off I'm a wheelie maniac I just love doin them... this may not be in everyones heart but.. If you want to wheelie your sv here's what to do.


1st gear wheelies:

Drop back in your seat position, place your lower back as far to the rear as your seat allows.... stay within 10-20 mph and give the throttle a nice but short roll.. that should get your rpm's just right the first roll SHOULDN'T lift the bike.. right as you relase the first roll hit your throttle again and the bike should come right up and in control... A tug on yur bars is not really needed I tend to find that tugging on the

bars often results in the front wheel touching down on and angle wich will send you over the bars so be carefull... the first roll will feel like a bit of a lift but it just bounces the front a bit to set you in motion.. anyone whose ridden and enduro or dirt bike knows what Im sayin


I'm sure most of you know to keep your foot on your rear brake to sit the front wheel incase you get a lil too HIGH wich is easy to do on an sv


In 2nd gear:

Now 2nd is a bit harder then liftin up in 1st gear but still very very possible.. Same seat position as 1st gear wheelies Tuck your clutch and get the rpm's up to about 7 dump the clutch in an even and smooth manner and WAHLA! try to DUMP YOUR CLUTCH EVENLY otherwise The bike will jerk wich can result in a fall....


If you can keep it up long enough wheelies in 2nd gear leave room for shifting to 3rd... If your nervous about doing wheelies Then don't do them....


Marco...Built to Last NYC

Blue SV650S and lovin' it

http://i82.photobucket.com/albums/j259/SV650_photos/P1140039.jpghttp://i82.photobucket.com/albums/j259/SV650_photos/P1130008.jpg
Posted

Extract from http://www.svrider.com/


Tips & Tricks / How to's

How to make your own frame sliders


Date: Tuesday, November 7, 2000

From: By Jason Herre

You can make your own frame sliders with a little time and just a little effort. Before you even start you must make sure that you have a few basic wood working tools. Foremost, you must have a lathe. I used a 25 year old Craftsman. Second, you need to have a drill press. You can use a hand held drill, but a press is a lot more efficient. Other tools that you will need are: a combination square, back saw, hack saw, chop saw, electric drill w/ screw driver bits, a short bar clamp, 15/32" drill bit, a 1 1/8" Forstner bit and a little piece of wood. 2" Nylon round stock was sourced from a local plastic supply company. There is bound to be a place around where you can find this.


For a non-s model, measure a piece of round stock that is 3 3/4" and cut it with the chop saw. Measure to find the exact center and draw an "x" on the top. For the spindle (end A) end you must cut the "x" with the back saw; the teeth on the spindle will bite into this "x". Measure down 1/2" from end A, mark with a black sharpie. Measure from the bearing end (B) 1/4" and mark with the sharpie. For end B, a piece of 3/4" pine board must be affixed with some small drywall screws. Find the middle of end B.


Place the unit onto the lathe making sure that the stock is 100% centered. Use the sharpie to mark the rest of your lines while the unit is turning. Using a Parting Tool (if you have a lathe, you know what they are) start to work the material off of end A from the line at 1/2". Continue to work this end until this end fits into the hole where the long bolt used to reside. As you do this you will have to occasionally clear the shavings from the spindle because this material does not chip, it spits out strings, and they get wound up in the spindle. Once end A is the correct size, all that is needed to put a small bevel into end B at the line. Complete the above steps for the other side. Please realize that the two sides are different sizes.


On end B start a hole in the center w/ the forstner. Just start the hole because it is quite hard to drill out all of that material. Drill just far enough that you start the 1 1/8" hole and can get back into it. Flip the slider over and drill the mounting hole w/ the 15/32" drill bit. If you have a good drill index the bit will go right through. You do need to get a bit that is long enough to reach all of the way thought the slider. After this is drilled out, you will find that end B drills a lot easier now that the pilot is drilled. This hole should be about 2" deep.


With all of the drilling done you can cut the excess off of end B so that the bevel looks nice. And presto, you have a frame slider. The next thing to do is to find suitable means of mounting the sliders. At the local hardware store one should be able to find the 12mm threaded rod to mount the sliders. I chose to use the fine threaded rod for the extra strength that it provided. The way that I did the bolt is to place the nut and washer on one end and put it all together. Mark the end without the nut and washer at the edge of the slider. Then take it all back apart and run the nut all of the way down the rod till it is 2" past the mark. Using the hack saw cut the rod just on the far side of the nut. Then take the newly cut end, and buff it on a belt sander or something like that. I put locktite on this nut so that I never took it off again. It is really hard to put a nut onto a cut end of threaded rod, so locktite it on there. Put all of the pieces back together, and wowwee look at them sparkle.


http://www.svrider.com/tips/images/frameSliders/Mvc-001f_lo.jpg


http://www.svrider.com/tips/images/frameSliders/Mvc-002f_lo.jpg


http://www.svrider.com/tips/images/frameSliders/Mvc-004f_lo.jpg


http://www.svrider.com/tips/images/frameSliders/Mvc-005f_lo.jpg


http://www.svrider.com/tips/images/frameSliders/Mvc-007f_lo.jpg

http://i82.photobucket.com/albums/j259/SV650_photos/P1140039.jpghttp://i82.photobucket.com/albums/j259/SV650_photos/P1130008.jpg
Posted

Extract from http://www.svrider.com/


Tips & Tricks / How to's

Riding Tips

Date: Sunday, April 8, 2001

I did an outline of riding tips, condensed from various sources (friends, books, magazines, this forum, etc.). Several people on the list have looked at it and added to it, and they all seem to think it's pretty good. I did it for my own reference, but several have said I should make it available to the rest of us. (Warning: It is long.)


Download Here (44k - MS Word doc)


-Nathan

http://i82.photobucket.com/albums/j259/SV650_photos/P1140039.jpghttp://i82.photobucket.com/albums/j259/SV650_photos/P1130008.jpg
Posted

Extract from http://www.svrider.com/


Tips & Tricks / How to's

Zero cost Fender Eliminator

Date: Wednesday, August 14, 2002

From: Bradley Cunningham

Here's a quick & easy way to partially eliminate the fender on the SV while keeping the blinkers, plate light & rear reflector - for free!


You will need a large phillips &/or slotted screw driver, pliers and heavy duty scissors.


First remove the fender extension, licence plate and bracket, then put the bracket back on upside down.


I used the pair of heavy duty kitchen style scissors, and cut a straight line directly below the licence plate bracket all the way across the fender. Then I cut from the corners of the plate bracket at an angle up to the blinker mounts. Cut slowly and the cuts will come out clean, and you cant even tell the plastic has been altered.


Put the licence plate back on using the bottom holes, and you're done. It looks a lot better than the stock bulky fender, and still keeps all factory lights intact!


Punkbrad - Huntington Beach, CA.


http://www.svrider.com/tips/fender-elim/new-tail.jpg

http://i82.photobucket.com/albums/j259/SV650_photos/P1140039.jpghttp://i82.photobucket.com/albums/j259/SV650_photos/P1130008.jpg
Posted

Hart & Jocelyn, remember cheong cut your KNN air filter inlet? Read This.


Extract from http://www.svrider.com/


Tips & Tricks / How to's

K&N air filter- updated, the real story and the final fix- guaran teed!

Date: Friday, August 3, 2001

From: Pascal Reid

Over the last six months, I have sent numerous posts with my testing of the K&N air filter. I adjusted the carbs 8-10 times making numerous changes to the needle, the air/fuel screw, and doing side by side testing with the stock air filter Nathan Burney donated for the cause. My conclusion was that the K&N just was not a quality filter and the stock actually allowed more effective airflow than the K&N.


On the 11th of July, after admitting that there was nothing else I could do to get the filter to work, I sent an e-mail to Dynojet and K&N explaining the lack of airflow and if they had any suggestions to rectify the poor performance.


A few days later I received this e-mail back from Dynojet.


-------

Because that filter is brand new to the market, we have not done any testing with it yet. What I would recommend is putting your stock filter back in, and hold it until we can update our kits for the K&N Filter. Usually there is no changes that have to be done for the filter, but on that bike, the filter does a lot.

Phil

Dynojet Research

1-800-992-4993

-----------------


Then a few days after the e-mail from Dynojet I received a response from K&N. Unlike the experience another lister had with the response of paper or leaves being in the filter, Lisa Sutton from K&N was not only professional in her reply but persistent to get my 100% satisfaction and resolution to the air filter woes. A couple of e-mails back and forth, and this was her response after chasing down the head of the powersports dept at K&N:


When we first developed the air filter we developed it with a smaller opening on the filter which flowed less air than stock. This would make the bike run rich. We have since then redeveloped the air filter that actually flows more than stock. If you would like to try and return and exchange your filter we can try that and see if it helps with the rich problem. You can reach us at 800/858-3333.


Thank you

Lisa


I called her and accepted her offer to try out the new filter. My goal this time was to just do a plug-n-play with no mods made at all leaving the Dynojet settings "as is".


Lisa sent the new air filter "next day delivery" . I proceeded to look at it, see a better looking filter and swapped with the stock air filter. Before starting the testing, I made sure to check the settings covered below and that the carbs were perfectly synched, all looked ready.


Test environment:


Carb setting- Dynojet Stage 1 (3rd clip on needle, 3 twists on air/fuel screw.) synched carbs to level from idle to 6K (less than half a cm off on stick at 6K) Temp- 73F-86F


Roll on at 4th gear and 4K on tach (40mph). (Goal here is to see smooth acceleration with little to no lag, surge and/or hesitation)

Terminology:(mine not the dictionary)

hesitation= slight delay initially then responds to throttle input

surge=responds to throttle input but not smooth

Stock filter

At gradual WOT- smooth all the way up.

At quick WOT (wide open throttle) slight hesitation but very minor, nice pull.

cruise/steady speed- okay, very minor random surges


OLD K&N Air Filter (From old testing results)

At gradual WOT- slight hesitation

At quick WOT- serious surge and hesitation (lags .5 seconds) possible stalling if throttle not released. begins pulling at around 6K

cruise/steady speed- okay, like stock just not as crisp


NEW K&N Air Filter

At gradual WOT -smooth all the way up

At quick WOT- VERY slight surge pulls nicely and quickly

cruise/steady speed- much improved and smooth- better than stock here


The question you may be asking is, "did the new filter work?" Well, I can say the NEW filter is night and day compared to the old filter.

As Lisa mentioned the hole is enlarged to accommodate more air flow. An analogy would be (size not performance) old K&N is to new K&N as Stock is to snorkletomy. The old hole is 4.5cm the new 5.75cm.


The NEW K&N is better now than the stock. It is smooth at steady throttle, smooth on acceleration, quick to get up to speed for passing and the hesitation is so minor it's not really even worth mentioning. Note however that this is based on WOT from 4K, if your at the normal 5-6K one rides at there is immediate and quick acceleration with no problem at all. So if you have one of the early prototypes, which has a raised hole (the new filter is completely flat on top) you may want to pull it off the shelf and call K&N for a swap. I was informed that the filter was replaced about a month ago so if your filter is older than that check with K&N to see if you qualify.


One thing I am convinced of, after all the testing I did on the old filter, I can tell you the new filter works significantly better and it's a keeper. I strongly suggest all of you that have battled the K&N problem give them a another try, I assure you it WILL be worth it. If anyone gets a response from Customer Service they are not happy with, consider asking for Lisa.


Pascal

http://i82.photobucket.com/albums/j259/SV650_photos/P1140039.jpghttp://i82.photobucket.com/albums/j259/SV650_photos/P1130008.jpg
Posted

KooTeowMan & Denden, try this?


Extract from http://www.svrider.com/


Tips & Tricks / How to's

Free Flushmount turn signals

Date: April 2003

From: john schwaderer


http://www.svrider.com/tips/flushmount/dfjnzg.jpg http://www.svrider.com/tips/flushmount/fnxdfgnx.jpg


Free flush mount turn signals may not be legal in your state...


Put those useless air dams to work!


First take your blinker stalks off completley and unhook the connector. It's easiest to do this if you pull all of your side fairing off.


#1 take apart your blinker assembley and steal this little bracket.


#2 The bracket in question


#3 Use the screw that held in the bracket and screw it into the housing use the side that already had a screw in it (this will assure good alignment)


#4 this is the old blinker hole. Your going to screw the other end of the bracket into the existing holes that initially held the whole blinker on the fairing


#5 This is what it looks like inside the fairing. Tighten the screws good and this way once you get it in you can just bend the bracket till the light fits good into the air hole on the fairing.


http://www.svrider.com/tips/flushmount/wewew.jpg


Pretty simple.


Thank you,


John Schwaderer

http://i82.photobucket.com/albums/j259/SV650_photos/P1140039.jpghttp://i82.photobucket.com/albums/j259/SV650_photos/P1130008.jpg
Posted

Nice idea on the signal light. But gotto work on the cosmetic abit to have a solid look.


:smile: :smile:

http://i82.photobucket.com/albums/j259/SV650_photos/P1140039.jpghttp://i82.photobucket.com/albums/j259/SV650_photos/P1130008.jpg
Posted

I'll just fix on the stock one. So bright and visible.

video.google.com/videoplay?docid=-594683847743189197


http://i5.photobucket.com/albums/y192/brendanchin/Yee.jpg

Posted

How much did you pay for the stock signal light?


:confused: :confused: :confused:

http://i82.photobucket.com/albums/j259/SV650_photos/P1140039.jpghttp://i82.photobucket.com/albums/j259/SV650_photos/P1130008.jpg
Posted

Trying to sell now.... you wanna buy?

Got it at Ever Sucess @ 60sgd each, the price of the signal lights just make me sick....


You want I can sell to you, my fairing cracked, can't install.


Brand new @ 55sgd each. bloody sh*t.... lose ten dollars just like that...

video.google.com/videoplay?docid=-594683847743189197


http://i5.photobucket.com/albums/y192/brendanchin/Yee.jpg

Posted
Originally posted by Denden@Aug 9 2006, 02:59 AM

Let me know when you're free and I'll bring you to the place.

Hi denden, are you free on this friday or saturday?


is it convience for you to bring me to the place which you mentioned before to buy the lower faring?


My contact is 94302071.


Thanks


regards :smile:

http://img.photobucket.com/albums/v703/kazuhikyo/combination1.jpg


The more I ride my SV, the less I care about going to the annual bike show and looking at new,

or expensive, or exotic machinery. I'm continuing to mod my bike into exactly what I want it,

and enjoying every mile I put on it.

Posted

let's go shopping~

sv meet up this weekend~~

http://www.picturesky.com/albums/userpics/11337/tri_daytona675.jpg


counting down again to the final class of license..


riding.. freedom.. it comes together..

Posted

http://img.photobucket.com/albums/v484/2100spectrum/Meet%20Up/MarinaSquareHKeaterycopy.jpg


THURDAYS HORNET MEET UP

17th Aug 2006

8pm - Till Late


Place: Xin Wang HK Cafe


Cafe is along the arc rd(raffles link) facing city link


Park next to cafe. (preferred)

Rd in front of cafe now not use.

Enter Raffles Link opp esplanade.

or

- Free parking in Marina Sq

entrance near Carls Jr Burger...

ride all the way to the right.

Up Escalator (walk up please)


Please list your name if u are coming. Thks


1. Spectrum (Hornet 900)

2. Motrax (Hornet 600)

3. Chi Yen (Hornet 900) & NUS Gang

4. Gyan (XR400)

5. Shaun (Hornet 600)

6. Eric28 (Hornet 250)

7. Au (CB1000)

8. St Du Du (CBR1100) after 10pm

9. Vicious Kitty (Ta200)

10. Dino (CBR1100)

11. Zod (RVF400)

12. Earlybird (CBR1100)

13. Scarab

14. Denden (SV650)

15. Blue Kiss (TA200)

16. Royong (Hornet 900)

17. Media Velocity (Hornet 900)

18. Gabng (Hornet 600) After 10pm

19. Hack & Partner (Hornet 250)

20. Hart (SV400)

21. Liu (CB750)

22. Wildcat (Sp)

23. Peter (Shadow)

24. Eien (Fazer1000)

25. Wayang (R6)

26. Takumi18 (H9) - anybody going earlier??

27.

28.

If u are reading this.... u are invited!


I list the bike type to make easy iden of riders...


It is also a Good time get to know the rest of the team

So when we go for our rides...

Familiarity will help us take better

care of each other.


Well, let's see whether people are interested.

video.google.com/videoplay?docid=-594683847743189197


http://i5.photobucket.com/albums/y192/brendanchin/Yee.jpg

Posted

http://img.photobucket.com/albums/v484/2100spectrum/Meet%20Up/MarinaSquareHKeaterycopy.jpg


THURDAYS HORNET MEET UP

17th Aug 2006

8pm - Till Late


Place: Xin Wang HK Cafe


Cafe is along the arc rd(raffles link) facing city link


Park next to cafe. (preferred)

Rd in front of cafe now not use.

Enter Raffles Link opp esplanade.

or

- Free parking in Marina Sq

entrance near Carls Jr Burger...

ride all the way to the right.

Up Escalator (walk up please)


Please list your name if u are coming. Thks


1. Spectrum (Hornet 900)

2. Motrax (Hornet 600)

3. Chi Yen (Hornet 900) & NUS Gang

4. Gyan (XR400)

5. Shaun (Hornet 600)

6. Eric28 (Hornet 250)

7. Au (CB1000)

8. St Du Du (CBR1100) after 10pm

9. Vicious Kitty (Ta200)

10. Dino (CBR1100)

11. Zod (RVF400)

12. Earlybird (CBR1100)

13. Scarab

14. Denden (SV650)

15. Blue Kiss (TA200)

16. Royong (Hornet 900)

17. Media Velocity (Hornet 900)

18. Gabng (Hornet 600) After 10pm

19. Hack & Partner (Hornet 250)

20. Hart (SV400)

21. Liu (CB750)

22. Wildcat (Sp)

23. Peter (Shadow)

24. Eien (Fazer1000)

25. Wayang (R6)

26. Takumi18 (H9) - anybody going earlier??

27. Arjen (Wave)

28.

If u are reading this.... u are invited!


I list the bike type to make easy iden of riders...


It is also a Good time get to know the rest of the team

So when we go for our rides...

Familiarity will help us take better

care of each other.


Well, let's see whether people are interested.

åƒé‡‘难买早知é“.......

Posted

eh.. wat time will u be there?


i need to go pick up my hp.. it's at the service centre

http://www.picturesky.com/albums/userpics/11337/tri_daytona675.jpg


counting down again to the final class of license..


riding.. freedom.. it comes together..

Posted

Denden & I will probably be there around 9pm. Good timing for you?


:cheer: :cheer: :cheer:

http://i82.photobucket.com/albums/j259/SV650_photos/P1140039.jpghttp://i82.photobucket.com/albums/j259/SV650_photos/P1130008.jpg
Posted
Originally posted by SV650@Aug 17 2006, 01:22 PM

Denden & I will probably be there around 9pm. Good timing for you?


:cheer: :cheer: :cheer:

can can~.. :cheer:


for a while only though.. tired..

http://www.picturesky.com/albums/userpics/11337/tri_daytona675.jpg


counting down again to the final class of license..


riding.. freedom.. it comes together..

Posted

helo everyone... sorry ah(esp to denden,albert)... i can't make it yesterday cos I was tired after my event in the evening... look forward to seeing you all soon...


how was yesterday? fun? how was the food? a lot of bikers went? sure cool if everyone(sv) turns up..

Posted
Originally posted by Orangdez@Aug 18 2006, 07:50 AM

helo everyone... sorry ah(esp to denden,albert)... i can't make it yesterday cos I was tired after my event in the evening... look forward to seeing you all soon...


how was yesterday? fun? how was the food? a lot of bikers went? sure cool if everyone(sv) turns up..

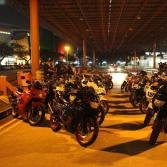
Many many bikes turn up... cannot count... got 5 SVs, if you came, it'll be 6!

Its ok, see what Denden will organise when he comes back from Frazer Hill....

Posted

ok tat's a good record for SV riders...i guess it might have caught the eyes of everyone happen to be nearby... it's not a common sight to see so many riders together. I only see harley group most time...

Posted

Den and sv650 at fraser.. hope they are having lots of fun..

i can't go.. hai~

http://www.picturesky.com/albums/userpics/11337/tri_daytona675.jpg


counting down again to the final class of license..


riding.. freedom.. it comes together..

Join the conversation

You can post now and register later. If you have an account, sign in now to post with your account.

Guest
Reply to this topic...

×   Pasted as rich text.   Paste as plain text instead

  Only 75 emoji are allowed.

×   Your link has been automatically embedded.   Display as a link instead

×   Your previous content has been restored.   Clear editor

×   You cannot paste images directly. Upload or insert images from URL.


  • DAIS_ShellBAU2024_Motorcycle_SingaporeBikesBanner_300x250.jpg

     
×
×
  • Create New...